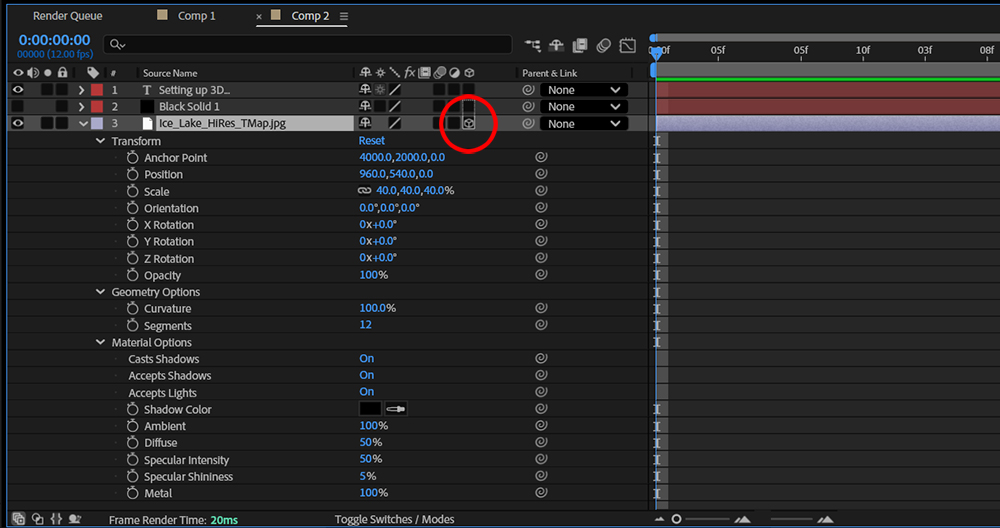
Once a layer is switched into 3D, a number of options are added to the transform list for that layer. An additional property heading, called Material Options is now also listed. Twirling this down reveals a list of properties that controls how light will interact with the layer. Wiill it be reflective or diffuse? Will it accept shadows or cast them? Will it accept lights? These are all tools are rquired for handling an element that now exists in XYZ space. (Shadow darkness and diffusion is controled in the Light Options twirl-down for each light, along with the usual controls for changing color and intensity of the illumination.)
Another addition is the Geometry Options, which allow the user to define a curved surface rather than a flat one. Increasing the Segments here will create a smoother arc at the cost of render time.